Monday, January 8, 2024

Ram V Chary: Three Tips for Sports Photography


Ram V Chary: Sports Photography Tips for Beginners

A sports photographer has to be close to the action, capturing incredible action shots and intense emotions. As amazing as this is, the intensity and fast pace can also make sports photography very challenging. Here are some tips that will help you get started.

images.pexels.com
Understand your settings. 

When shooting sports, you often have to capture high-speed movements, says Ram V Chary. To ensure the action is frozen, you need a fast shutter speed. The faster the movements, the faster your shutter speed has to be. In general, a minimum shutter speed of 1/1000th should freeze the action for a sharp image. You need to select a fast shutter speed while balancing the lowest ISO possible and widest aperture. A wide aperture will create a short depth of field that makes a player stand out against a blurred background, and a low ISO will help produce the best image quality, notes Ram V. Chary.

Know the sport.

Before you shoot a sport or team, watch some games to get a feel for the flow of the game. This will help you anticipate where the action will happen so that you can be in the best position when an important play happens. Do any of the players have unique celebrations or special pregame traditions? If you're not sure, ask a few photographers who cover the team more frequently. Any information you can find to help you prepare will go a long way, notes Ram V Chary.

images.pexels.com

Tell a story.

Action shots are awesome, but there's so much more to sports than just the incredible plays. Look for fans, scenic shots, athlete emotions, and any other details that tell the story and capture the atmosphere of the game. In sports photography, you have the unique opportunity to capture moments that average fans don't get to see.


Thursday, December 21, 2023

Ram V Chary: Use 2000s Aesthetic for Your Graphic Designs


Ram V Chary Shares How to Use the Trendy 2000s Elements


The aesthetics of the 2000s are making a strong comeback in graphic design, and it's no surprise why. The turn of the century brought about a unique and iconic style that's both nostalgic and visually appealing. Whether you're a designer looking for inspiration or a brand seeking to connect with a specific audience, Ram V Chary says integrating the 2000s aesthetic into your graphic designs can be a winning strategy.


Unsplash.com

One of the key elements of the 2000s aesthetic is the bold and vibrant use of color. Remember the era of hot pinks, metallic blues, and neon greens? These hues can instantly grab attention and inject a sense of energy into your designs. Consider using these colors as accents or even as dominant elements in your graphics to evoke that Y2K spirit.

Typography from the 2000s also has a distinctive style. Playful and experimental fonts were in vogue, and you can tap into this by using unconventional typefaces in your designs. Ram V Chary says mixing bold and wacky fonts can create a fun and nostalgic vibe.

Another characteristic of the 2000s aesthetic is gradients and glossy elements. Shiny and metallic effects were widespread during this era, and incorporating them into your designs can give them a glossy and retro look. Gradients, especially in vibrant and contrasting colors, can add depth and dimension to your graphics, says Ram V Chary.

Unsplash.com

Don't forget the prevalence of technology in the 2000s. Incorporating retro tech elements, like chunky computer screens, early mobile phones, or pixelated icons, can be a fun way to create a nostalgic tech-inspired design.

Additionally, consider drawing inspiration from the pop culture of the 2000s. References to music, movies, and fashion from that era can resonate with audiences who grew up during that time. Think iconic fashion items like cargo pants and crop tops or symbols like the iPod and CD players.

Ram V Chary says that more than nostalgia, it's about leveraging unique and visually engaging designs that will stand out. Whether you aim to create a retro look, add a playful twist to your designs, or evoke the spirit of a bygone era, the 2000s aesthetic offers a wealth of creative possibilities. So, get inspired and infuse a touch of the Y2K era into your graphic design projects.

Wednesday, November 15, 2023

Ram V Chary: A Beginner's Guide to Graphic Design


Learn All About Graphic Design with Ram V Chary

Ram V Chary says that the fundamentals of graphic design make up the groundwork for all images. These essential elements must be incorporated into a graphic to stand out and be effective. Images can quickly fall flat without them or become hard to look at.  

istockphoto.com
On the other hand, though, they are also easy to apply once you understand how each one works. These basic elements include color theory, shape usage, line usage, scale, and form.  

Without color, images would be black and white. While this is still possible, looking at it quickly becomes monotonous after a few minutes. According to Ram V Chary, colors make the world go around, so they need to be used for anything to stand out. The most important thing with color usage is consistency.  

Ram V Chary mentions that if you use a certain color for one element in your graphic, ensure all other elements use the same color. This is part of what makes brand identity, which designers must also be aware of when using specific colors. The last thing anyone wants is for their image to have a "loud" color that takes away from the actual content of what they're trying to convey.

istockphoto.com
Similar to colors, shapes are integral parts of graphic design as well. They can be used in various ways and put into endless configurations. That said, designers need to know how and why they use shapes.  

Geometric shapes are great for this because there are so many out there; it's easy to get creative. However, Ram V Chary reminds everyone to be careful with how you use shapes. Just like with colors, if you use a certain shape for an element in your design, make sure that all other elements match up with that choice, Ram Chary adds. 

Tuesday, October 31, 2023

Ram V Chary on Taking Photos of Dangerous Animals

Ram V Chary's Seven Wildlife Photography Techniques


unsplash.com
While photographing wildlife and nature, remember some animals are predators and can pose a threat to you, says Ram V Chary. Bears, wolves, alligators, and panthers, to name a few, are wild animals that you need to photograph with extreme caution.

Here are essential tips to remember when you'd like to photograph a potentially dangerous animal:

Keep your distance. The only way to take a photo of a dangerous animal is from a distance, notes Ram V Chary. Keep a safe distance, and then use your longest telephoto lens.

Stay downwind. Most animals have a keen sense of smell, Ram V Chary points out. If you're upwind from an animal, it will most likely sense your presence. Your best chance of not being on the animal's radar is staying downwind.

Find a hiding place. Stay in a place where you can take good photos of the animal, but it cannot see you. Research will tell you where the animals often congregate and when they congregate there. It's crucial to arrive ahead of time and find a good hiding place that is downwind from the animal.

unsplash.com

Never try to entice the animal. Even wild animals will have respect for a human adult. However, it might attack you if you try to entice a wild animal with food or otherwise antagonize it.

Always shoot with a buddy. Two humans are more intimidating than just one. Ram V Chary explains that you and your photography buddy can watch each other's back.

Have an escape route. Before photographing dangerous animals, scout out the location and look for an escape route that gives you quick access to a shelter or safer grounds.

Photograph a sequence of images. Shoot in burst drive mode when you find animals doing interesting things. Press the shutter button when the animal starts moving and capture a sequence of images.

Thursday, September 7, 2023

Ram V Chary: How to Protect Your Camera in the Rain 


adorama.com
Ram V Chary on Keeping Your Camera Gear Safe and Dry

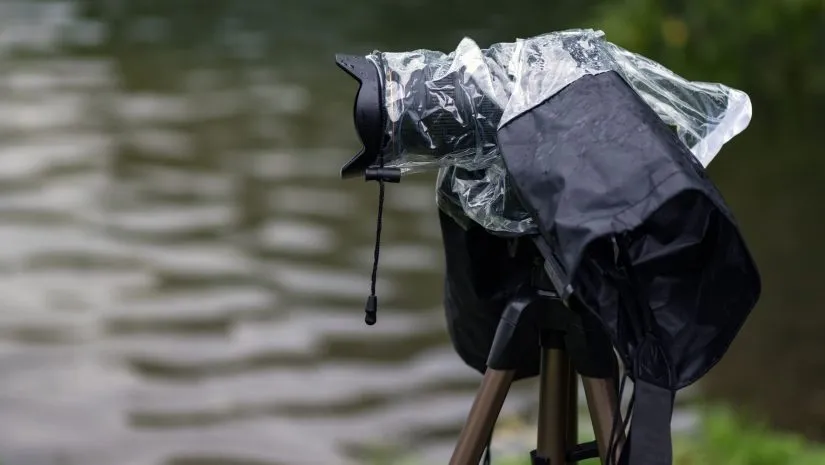
Is it raining again? Your camera should not be left exposed to the elements. Plenty of protective covers are available, and most are affordable. You've invested hundreds, perhaps even thousands of dollars on your DSLR camera, and a few drops of water can cause plenty of damage, says Ram V Chary. You need to then invest in rain protection gear to keep your camera safe. 

Whether it's sunny or raining outside, there shouldn't be any reason for you to stop taking stunning photos. Here are a couple of useful tips—as well as a few equipment suggestions—to help protect your camera gear while shooting in the rain.

Store Your Gear in a Waterproof Bag

Even when not shooting, you'll still need to protect your gear with a good waterproof camera bag. It's a must-have, especially when transporting your camera—which can be tricky due to the unpredictable weather.

Keeping your gear safe and dry shouldn't be a problem with something like a multi-functional waterproof backpack. Choose a backpack with soft-sided waterproof storage for your camera, another waterproof case for additional protection, self-draining mesh pockets, and more compartments for all your extra equipment.

bhphotovideo.com

Camera Rain Covers

If you can wear ponchos, why not your camera? That's the idea behind camera rain covers, which drape over any camera and lens, as well as most camcorders. An optical glass port is usually placed over the lens, so image quality doesn't suffer, notes Ram V Chary. If you're concerned about maintaining image quality during heavy rains, you can buy a reliable rain cover for a reasonable price.

Consider Using Thicker Camera Sleeves

Ram V Chary notes that thicker camera sleeves are designed to fit your camera more snugly and provide more protection against other harmful elements.

Wednesday, August 9, 2023

Ram V Chary: A Photographer's Dream Destinations

Ram V Chary on Places Photographers Should Visit

Image source: guidetoiceland.imgix.net

Wanderlust is a real thing. Right now, we're all thinking about where to go next. If your inner travel bug is suffering a serious withdrawal, it's time to start planning your next trip around the amazing travel photos you'll capture. With so many beautiful places to photograph and explore – from the epic Northern Lights to jaw-dropping Cape Town – it's hard to know where to start. Ram V Chary has rounded up some dream destinations for travel photographers so you can snap happy for a very long time!

The pagodas and forests in Kyoto, Japan Japan has done an excellent job preserving its traditional culture and traditions in Kyoto. In the heart of the city, you'll find many photo opportunities. Think Japanese pagodas, castles, and temples. North of the city, you'll find the famous bamboo forest in Arashiyama. Although the bamboo is quite dense, use the natural light in your images to capture the serenity of the place.

Image source: livejapan.com

The skies in Iceland Are you ready to go chasing waterfalls? Iceland is full of epic landscapes for seasoned travel photographers and beginners. During the day, Ram V Chary says you should spend time exploring Iceland's diverse landscape. You'll have plenty to capture with your camera lens, from geysers to active volcanoes, fjords, and black beaches. At night this dream destination comes alive with stunning views of the stars splayed across the night sky. You may even see the Northern Lights if you plan your trip from September to March.

The wildlife in South Africa Ram V Chary suggests exploring Table Mountain and Cape Town's incredible coastal scenery. What makes South Africa stand out is its opportunity for wildlife photography. Go on a safari to capture amazing photos of giraffes, elephants, and lions. South Africa's flat landscape makes capturing Mount Kilimanjaro in the background easy.

Thursday, July 6, 2023

Ram V Chary: How to Take Photos of Natural Disasters

Ram V Chary on Taking Disaster Photos: A Guide

Image source: amnh.org

No one is prepared for natural disasters, not even seasoned photographers. So, when you see photos of disasters – especially natural ones like flooding and earthquakes – capturing just the right moment, you'll wonder how they were taken. Veteran photographer Ram V Charyshares tips on how to take photos of natural disasters.


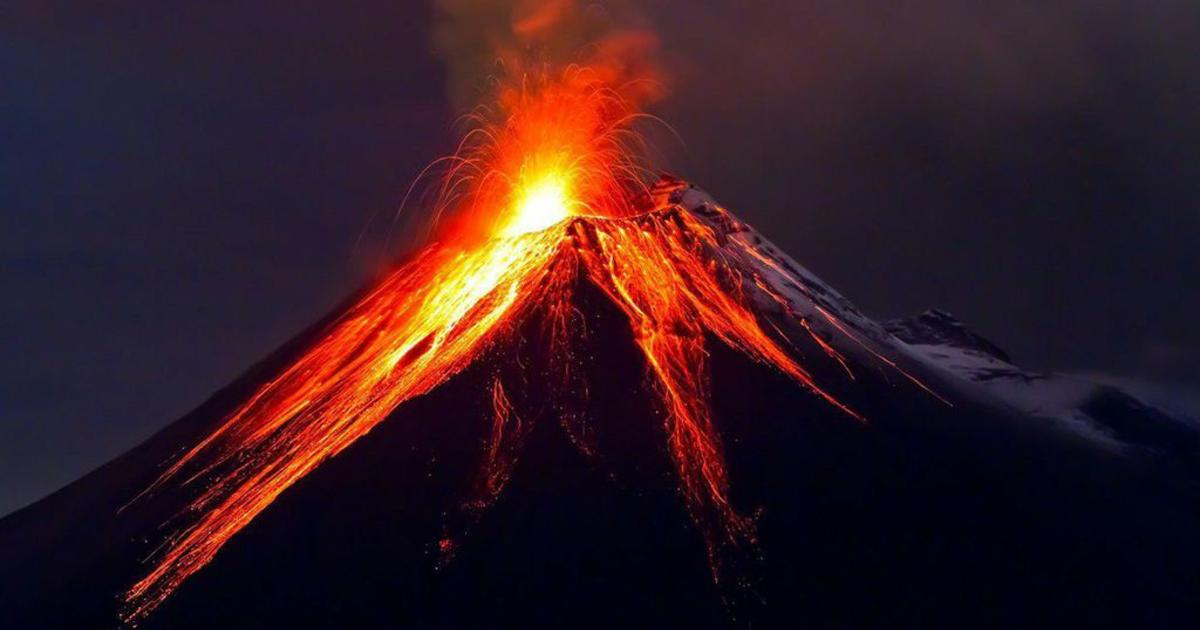
What equipment do you need? Your camera, of course, is your main equipment. For this reason, you need to bring essential camera accessories, specifically those that will keep your camera safe from water, moisture, dust, or even fire. You should have a waterproof and shockproof case for your camera. Or, if you can, purchase a water and shockproof camera, so you won't need to bring the bulky equipment case. Some dSLRs are dust resistant, so they're safe to use even when you need to take photos of a mudslide or a volcanic eruption, adds Ram V Chary.


Image source: harvard.edu

Ram V Chary says do not use plastic to protect your camera when covering a forest fire. The heat can melt the plastic. The best way to protect your camera during a fire is to wrap it with a cloth covered with aluminum foil.

How do you take the photos? When taking photos of disasters, the first thing that you need to remember is sensitivity. You have to be sensitive about how a photo can affect the people who will see it. So, choose only images that are ethical. Avoid taking photos that are too demoralizing or disturbing.

Honesty is also important when taking photos. Don't stage or manipulate a scene. Take the photo as is. This is the best way to convey the message and emotions that you want to share with the people. Don't overthink the technical aspects of your photos, says Ram V Chary. Just take them.